

Amy and I are avid Tim Ferriss readers and listeners. When we listened to a podcast episode about saunas and performance enhancement, we were sold on sauna health benefits! We'd used them periodically in the gym, but never regularly. Before we proceed with the story, Tim has a great disclaimer on his post which I'll directly adapt here:
SCOTT'S DISCLAIMER ON THIS POST: Please don’t be stupid and kill yourself. It would make us both quite unhappy. Consult a doctor before doing anything described in this post or on this blog.
BIGGER LAWYERLY DISCLAIMER: The material on this blog is for informational purposes only. As each individual situation is unique, you should use proper discretion, in consultation with a health care practitioner, before undertaking the protocols, diet, exercises, techniques, training methods, or otherwise described herein. The author and publisher expressly disclaim responsibility for any adverse effects that may result from the use or application of the information contained herein.
As endurance athletes, Amy and I were most intrigued by this endorsement of sauna use from Tim's post:
... acclimating yourself to heat independent of aerobic physical activity through sauna use induces adaptations that reduce the later strain of your primary aerobic activity. – Rhonda Perciavalle Patrick, Ph.D.
In short, exposing ourselves to heat in the sauna will help our bodies adapt to the stresses we put ourselves under during endurance events. Rhonda also writes about the benefits of sauna use as it relates to muscle growth and regrowth (post-injury). We were sold on the benefits. Now, how to sauna more regularly?
Members No More
In early 2017, we'd left a gym we'd been long-term members of due to staffing drama involving group fitness. Amy wrote about how we were part of four "gyms" after that. Since writing that post, we'd not found ourselves at the YMCA nearly as often as we would. By the end of August, we realized that it wasn't worth paying for, given our usage. Now that we'd heard about the health benefits of a sauna, we no longer had access to one!
Evolution of a Backyard Space
When the kids were little, the back of our yard was appropriately occupied by a sandbox and swingset. As they grew up, so did our backyard. We replaced the swingset and sandbox with a garden and a storage shed. We also installed a shade sail along the way, improving our deck space and making it a wonderful place to hang out. We wondered: would we be able to afford an outdoor sauna? If so, would it fit well in the space beside our garden? We started researching available options and quickly gravitated to the aesthetic of a barrel sauna. Almost Heaven Saunas had a "Specials" page on their web site that advertised a 6-person sauna with an electric heater for essentially 50% off the normal price. We plugged in our credit card details and began waiting (and planning) for its arrival.
Arrival

This is what the shipment would look like
The sauna arrived on July 6 and I called my Dad to see if he (and his hand truck) would be available to help unload. Almost Heaven makes it clear that the truck will drop off at the curb. That proverbial "last mile" is up to you, and we had to get it into the garage until a few stars aligned. As we surveyed the four boxes in the truck, I became increasingly grateful that my Dad was there. These boxes were HEAVY! The heater was in a box of its own, and it was manageable for one person to carry. One long rectangular boxes contained the staves for the outside (curved) part of the sauna, and the other contained all the other parts (benches, hardware, and rocks!) The remaining box was 7' in diameter and contained the two end pieces.

Gravity was a wonderful help getting boxes off the truck
We carefully lowered each box to the ground, got under it with the hand truck and gingerly wheeled each of them into the garage. It was quite a job, especially the box with the staves. It was a box full of wood, after all!
Preparation
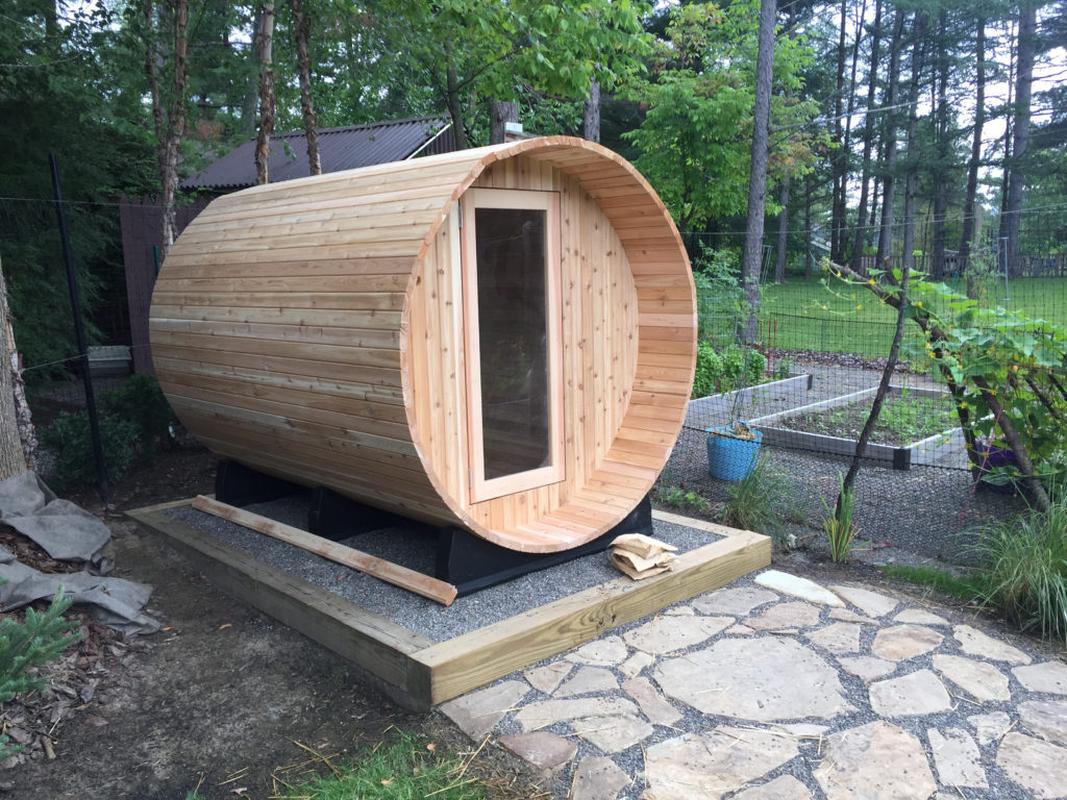
We needed a level place to install the sauna, along with conduit for electrical service to be run out there. It's about 100' from the electrical box, so we involved KJ's Property Care in a plan to run the 1" conduit (digging safely along the way), build a level pad and landscape a stepping stone path. Kyle and his crew did a fabulous job over several weekends of work. The weather in July here was monsoon-like, so there were a few rain delays during the project. Our backyard can be a swamp anytime there's a lot of rain, so add in some excavation work and poor drainage turns into no drainage! When things dried out and they were all done, the space looked perfect. We now had a level pad for the sauna (two courses of interlocked landscaping timbers, filled with crusher run and pea gravel), conduit from the house coming up into the rear of the pad, and a beautiful stone path using Black Hills Rustic flagstone from Sensenig's in Geneva. We chose a brownish stone instead of gray, since our deck and house all share hues of tan and brown. I took some of the remaining stone and built a small patio for our outdoor fire pit, too. It was time to assemble!
Assembly
Despite the sauna's early July arrival and the readiness of the sauna pad, we had a few things holding up the actual assembly. Our summer was jam-packed with staccato trips and events: a long weekend in Martha’s Vineyard and Boston, competing in the Cayuga Lake Triathlon, a trip to Oregon for Mountain Running Camp and a trip to NYC. We chose the first fair-weather weekend we were free: August 13 would be assembly day!
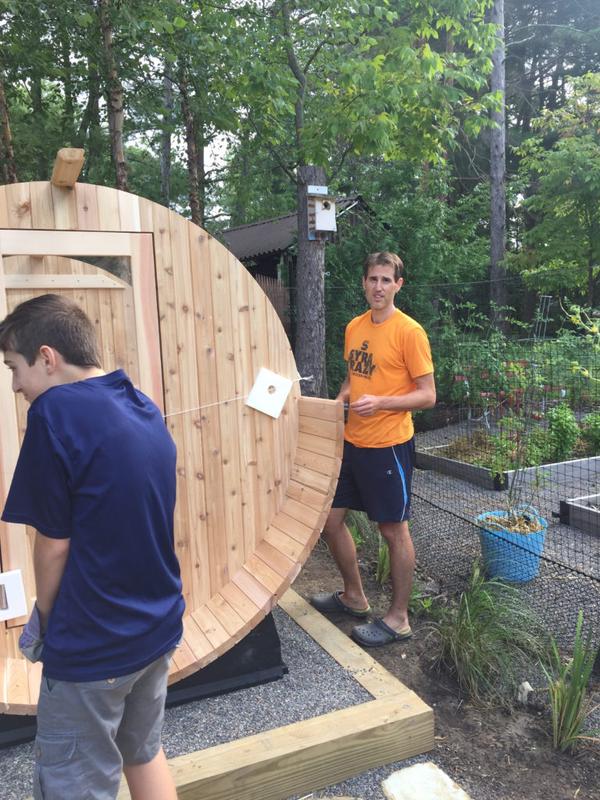
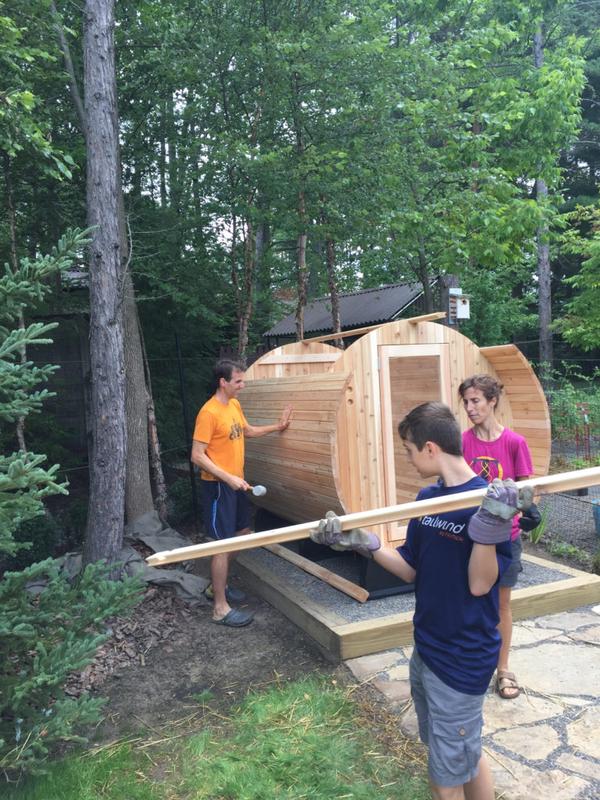
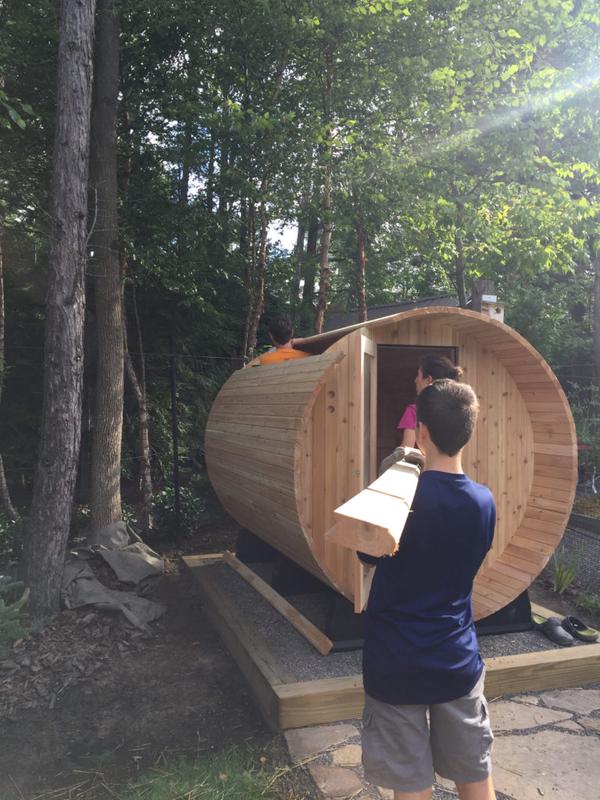
We chose a nice, sunny day to put the sauna together. I anticipated it would take much of the day, so I got a really early start, moving the staves in piles of 5-6 to a pair of benches in the backyard. Once we'd all enjoyed breakfast, it was time to get started! I had already finished the first step in the garage, using the controlled space to align the bases properly and screw the bottom staves in place. Amy and I carried that piece out and centered it on the pad.

Center piece on the pad, staves on the side
Next it was time to move the end pieces. Given their size and weight, we opted to use a winter sled to handle the transport. We put the bottom edge of each end piece on a sled and used that to drag it gently through the yard to the pad. It worked wonderfully! It took a bit of rotating to and fro to get the end pieces level on top of the base. It would be important to make them level, though, since nobody wants a door askew!

Side pieces set and leveled
We added the staves one at a time, nailing every other one to the end pieces until we got to the pieces at 9 o'clock and 3 o'clock.

Nailed to 3 and 9 'o clock
Now gravity would take over as we placed the remaining pieces along the top arc of the barrel. The last few were tricky, since the goal is a tight fit, but it was by no means as difficult as I thought it'd be!
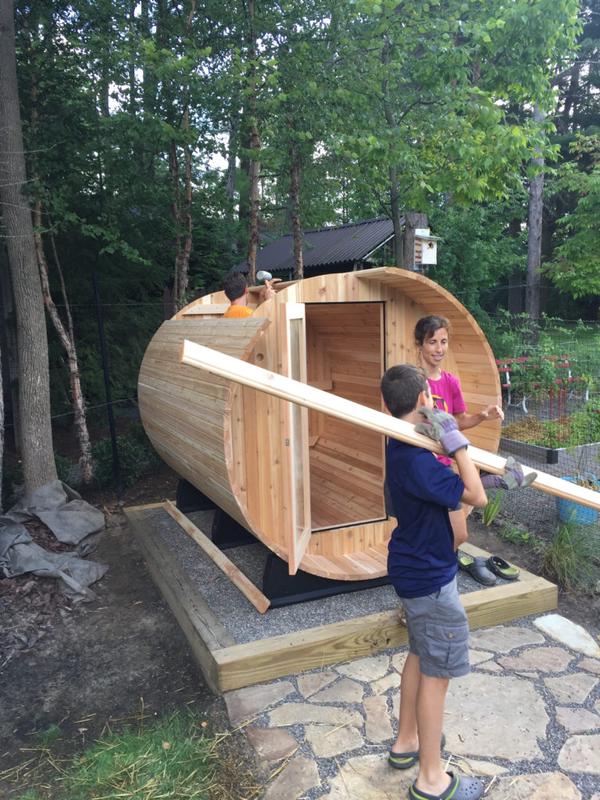
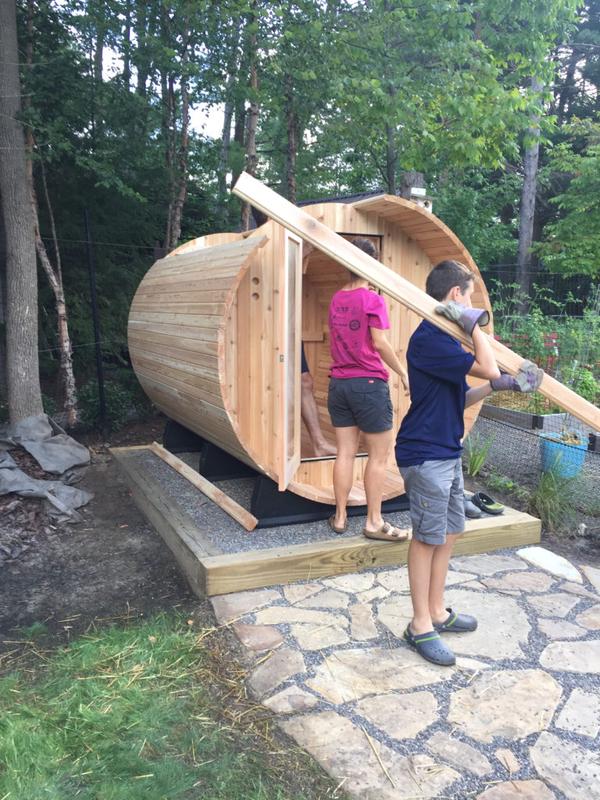

Xander shot a cool time-lapse of the construction. It's fun to see the pile slowly disappear on the left!
We attached and tightened the metal bands that hold the unit together. This was probably the toughest part, mostly due to the design of the hardware. It's a threaded bold with no head, so you have a nut that goes on both ends. *Editor's Note: After several weeks of use, we realized we needed to add a quarter-inch spacer stave due to a small gap in the top within which we could see sunlight. My Dad came over once more, and sadly we'd cross-threaded both nuts on the last metal band. I had to cut off the bolt! He also had a set of wide-mouth pliers that helped us tighten the bands sufficiently so cross-threading wasn't as much a risk. So, my feedback to Almost Heaven is (a) longer bolts with a head end, and (b) advice to use wide-mouth pliers to bring the bands together before threading the nut on the bolt. That way, you don't need a hacksaw!* The interior and exterior benches were easy to assemble and install. We mounted the heater on the wall with just a few screws and awaited our date with the electrician.
Turning on the Juice

Heater, ready for wiring!
When Dave Hulle of Hulle Electrical Corporation called to make an appointment, I gave him some additional specifics of the project. I told him we were all set to "turn on the juice!" Dave arrived August 23 and worked most of the day to get us up and running. As usual, his work was beautifully done. Behind the sauna, he added a set of GFI outlets: one for the sauna's internal LED light, and another outlet that we've found useful for plugging in a vacuum for the interior, and will likely use for party lights in the future. We turned on the sauna late in the evening and followed the initial startup instructions.
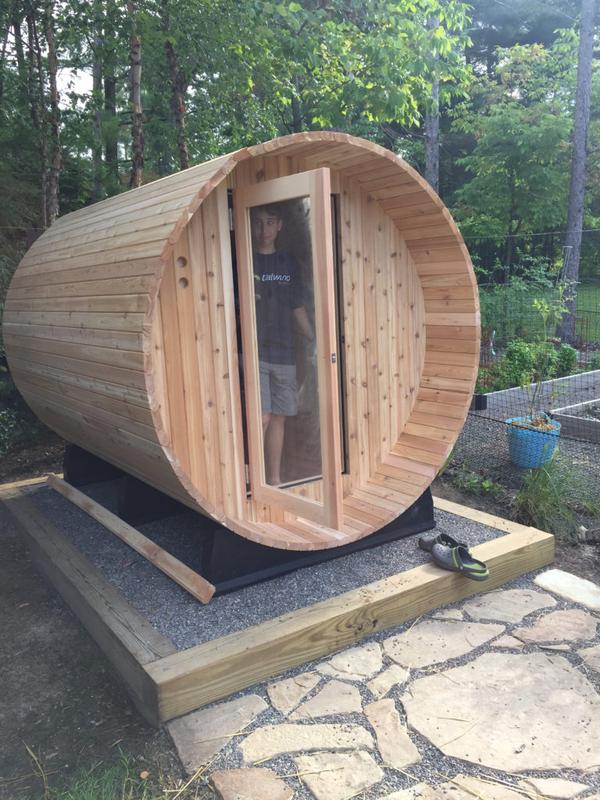
The Joy (and Sweat) of a Backyard Sauna
We've been using the sauna almost daily! We enjoy going out in the evening or anytime post-workout. The first few times, we noticed that despite the thermostat being all the way up, it was still cooler than we'd have liked. I mounted the sensor just a little bit lower than instructed, and since then it's become sufficiently hot within the hour that it warms up (~55-70 deg C, ~131-158 deg F).
Our older selves will tell you whether the sauna made the advertised difference with endurance and recovery, but in the meantime, our younger selves are having an absolute blast.

Path from our house with fire pit in foreground
Related Posts
There are 38 other posts like this one. Here are some other recent ones:
 Women's World Cup Giant Slalom at Mont-Tremblant (December 2-3, 2023)December 3, 2023 – When Mont-Tremblant announced that they'd host a World Cup ski race for the first time in 40 years, we jumped at the chance to get tickets.
- A First-Time Cruiser’s Perspective: Family Time Aboard the Luxurious Explora IAugust 26, 2023 – We’ve just returned from a 6-night cruise on Explora Journeys’ Explora I. MSC is planning a series of 6 luxury ships in this class and we consider ourselves lucky to be among the first to experience it.
- 2022 Holiday Running WishlistDecember 10, 2022 – I'm taking a post-marathon break from running, so what better time than now to write about some of my favorite running things? This is my holiday wishlist for running.


