
Self-hosted Wordpress? Periodic updates and backups? Inflexible templates? SSL issues and inexplicable server spikes with GoDaddy? Forget it. I wanted out of the game of hosting my own Wordpress and paying money for what is admittedly not a series of highly-trafficked web sites. I read about static site generators like Hugo and Eleventy and saw the light. After some quick reads on comparing the leading contenders, I rolled up my sleeves with Eleventy.
The new sites are scottpdawson.com (this one), skirtrunner.com, taughannock.us, erdawson.com, xkdawson.com, and artofworkingremotely.com. I think I had the most fun with the Taughannock conversion, because it allowed me to really think freely about the templates and do some sophisticated things (IMHO) with auto-generating front matter like permalinks and calculating what season a post was generated in. Here are 12-ish things I learned after converting these four Wordpress sites to Eleventy.
Getting Started
I chose Dan Urbanowicz's eleventy-netlify-boilerplate project as a starting point. Netlify's automation and built-in SSL made it a very attractive choice. Here's the general startup process.
- One-click install
- Go to Netlify’s General > Site Details and change name to something more friendly
git cloneto my local desktop
From there, follow the README instructions:
npm install @11ty/eleventy- Edit
_data/metadata.json npm installnpx @11ty/eleventy --watchornpx eleventy --serve --quiet
I also chose to use Netlify's Large Media service to host full-resolution images and serve smaller versions to my pages. The setup documentation is fantastic and I tracked my images folder with git lfs track "images/**".
Downloading Wordpress Posts, Pages, and Images
I had to get my posts, pages, and images into my local folder before I could start updating them for use in Eleventy. I exported the whole site's contents as an XML file from Wordpress (go to your site's /wp-admin/export.php page and follow the instructions), and used FTP to fetch all of the images into my /images folder. I also got a great package for converting Wordpress posts and pages to markdown. Here's the steps I used for the markdown conversion:
git clonethe above repo and put your downloaded XML in the root foldernpm installnode index.jsand follow the instructions
By default, the tool converts only posts. There's an easy edit on line 39 of parser.js to convert pages on a second pass.
Batch Image Conversion using Mac Terminal
You don't need all of the size variations for the Wordpress images, since Large Media takes care of resizing for us. I'm on a Macbook, and found the following Terminal commands quite helpful. Your mileage may vary.
Rename jpeg to jpgfind . -iname "*.jpeg" -exec bash -c 'mv "$0" "${0%\.jpeg}.jpg"' {} \;
Remove all XxX sized images from Wordpress (Mac regex find is a little weird)find -E . -type f -regex '.*[0-9]+x[0-9]+.(jpg|png|gif|jpeg)$' -delete
Move all images from subfolders to single folderfind /path/to/images -mindepth 2 -type f -exec mv -i '{}' /path/to/images ';'
Batch Markdown Image Path Replacement in Visual Studio Code
I also found these useful to convert Wordpress image code to markdown image code. You have to use Regex find and replace in VS Code, and you might need to tweak these to your unique circumstances. My replacement text, for example, is for my own "picture" shortcode I wrote.
Replace resized image references
Replace !\[(.*)\]\((.*)-[0-9]+x[0-9]+.(jpg|jpeg|png)\)$ with {% picture "$2.$3", "$1" %}
Replace non-resized image references
Replace !\[(.*)\]\((.*).(jpg|jpeg|png)\)$ with {% picture "$2.$3", "$1" %}
Contact Form
The eleventy-netlify-boilerplate project also sets up a contact form with Netlify Forms as a processing backend. This all worked out of the box and was easy to set up. You configure notifications of submissions through Netlify's administration screens.
Content Management
I tried out the Netlify's content manager by accessing /admin on my published site. I added users in Netlify’s Identity console. I could edit a post and add an image, and it all synced back to my local via git. Very cool, but the service's limitations became clear pretty quickly. First, it requires some savvy I don't yet have to configure the CMS preview to be accurate, and also doesn't support any nesting of markdown files or images as of this writing. No worries for me, though, since I decided VS Code and git were a fine enough workflow for me.
Markdown User Snippets for VS Code
I found it helpful to configure Visual Studio code to spit out complicated markdown using user snippets. The file is stored in ~/Library/Application Support/Code/User/snippets/markdown.json. Make sure your VS Code's editor.tabCompletion is set to true. I used the following user snippets:
Search
I followed Phil Hawksworth's instructions for static search. Brilliant. It offers a fallback to doing a Google site search if JavaScript is disabled.
Gotchas
Well, almost gotcha, because I found solutions for these issues.
On git push after installing the Large Media service, I got an error saying git: 'credential-netlify' is not a git command. I found Piper's article really helpful here. Specifically, had to add "helper = osxkeychain" before the netlify line in /Users/username/.netlify/helper/git-config.
When I was just starting out, I didn't realize that permalinks should have trailing slash. It's in the documentation but it bit me anyway. If you find that files are not being written to filename/index.html and instead are being written to filename.html, check this detail. I also found that sometimes I needed to delete the _site folder with the generated content and just restart.
I ran into some problems configuring one of my repositories on another computer, specifically with Netlify's Large Media. Here are the steps I followed to get it configured for an existing repository on a new computer.
- Download Git Large File Storage from git-lfs.github.com
- run
sudo spctl --master-disablein the terminal. git lfs installsudo chown -R $USER /usr/local/lib/node_modulessudo npm install netlify-cli -gnetlify plugins:install netlify-lm-pluginnetlify lm:install
Deploying
After pushing my files to git, Netlify picked them up, generated the site, and made it live. All that remained was the map my existing domain's A record to Netlify, and they provided clear instructions for doing so.
Eleventy's Leaderboard
Eleventy has a performance leaderboard at 11ty.dev/speedlify. To add your Eleventy site to the leaderboard:
- Clone https://github.com/11ty/11ty-website
- Create a new file in
_data/sites/*.json(you can model after my commit) - Commit your new file and create a pull request
Resources
- Eleventy Documentation
- Git Repo for scottpdawson.com
- Git Repo for skirtrunner.com
- Git Repo for taughannock.us
- Git Repo for erdawson.com
- Git Repo for xkdawson.com
- Git Repo for artofworkingremotely.com
Related Posts
There are 23 other posts like this one. Here are some other recent ones:
 How to Inspect Hovered Elements (Menus, Tooltips, and Dialogs, Oh My)July 1, 2024 – I found this technique useful for debugging CSS inside ephemeral DOM elements.
- How to Automatically Create Google Calendar Events from a Google SheetFebruary 12, 2023 – If you need to automatically create Google Calendar events from data in a Google Sheet, this pared-down example should work well for you.
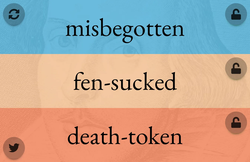
- Shakespeare Insult GeneratorOctober 10, 2021 – I created this Shakespeare Insult Generator: it converts three arrays of adjectives and nouns into a delightful random insult that would have thrilled the Bard himself.